

The Trader’s Secret Weapon: How to Build a Trading Journal That Actually Works
Most traders lose money not because they don’t have a good strategy, but because they don’t have a clear record of what they did, why they did it, and what happened next. Your trading journal is your personal flight recorder—it turns every trade into a lesson and every loss into data that makes you better. Let’s dive into the best practices that turn a simple notebook into your most powerful trading tool.
How It Works
A trading journal isn’t just a list of P&L numbers. It’s a structured log that captures the full story of each trade. The magic happens when you review your entries regularly and look for patterns—both in your wins and your losses.
The Setup
Here’s what a high-quality journal entry should include:
Looking for altcoin opportunities and smooth trading? Try KuCoin.

- Date & Time – When did you enter and exit?
- Market & Pair – e.g., BTC/USDT, ETH/BTC
- Trade Direction – Long or short
- Entry Price, Exit Price, Position Size – The raw numbers
- Setup Type – Breakout, pullback, reversal, etc.
- Emotional State – Were you feeling confident, anxious, or bored?
- Trade Rationale – Why did you take this trade? Be specific.
- Result – Profit or loss in both pips/points and percentage
- Lessons Learned – What would you do differently?
You can use a physical notebook, a spreadsheet, or a dedicated app like Edgewonk or Tradervue. The tool doesn’t matter—consistency does.
How to Review Like a Pro
Don’t just log and forget. Set aside 15–30 minutes every weekend to review your week:
- Win Rate vs. Risk/Reward – Are you winning often but losing big? Or winning rarely but making it count?
- Emotional Patterns – Do you revenge trade after a loss? Do you get overconfident after a win?
- Setup Performance – Which setups are your moneymakers? Which ones need to be dropped?
- Discipline Score – Rate yourself on sticking to your plan (1–10). Track this over time.
Risk Management
Your journal is your best risk management tool. Here’s how to use it to protect your capital:
- Set a Maximum Daily Loss – If you hit it, stop trading. Log the reason.
- Track Your Risk Per Trade – Never risk more than 1–2% of your account on a single trade.
- Flag High-Risk Trades – Trades taken outside your plan or during emotional states should be marked in red.
- Review Your Worst Trades – The goal isn’t to feel bad, but to identify the trigger so you can avoid it next time.
Conclusion
A trading journal isn’t optional—it’s the difference between gambling and professional trading. Start simple. Log five trades this week. Review them on Sunday. Look for one pattern to fix. Over time, your journal will become your roadmap to consistency, confidence, and profitability. The best traders aren’t the ones who never lose—they’re the ones who learn faster than everyone else.
Restaking Explained: EigenLayer and Beyond – The Ultimate Guide to Crypto Restaking
Introduction
Restaking is one of the most transformative innovations in the crypto ecosystem since the advent of liquid staking. By allowing staked assets to be reused across multiple protocols, restaking unlocks new layers of capital efficiency and security. This guide explains what restaking is, how EigenLayer pioneered it, and what the future holds for this rapidly growing sector.
Key Concepts
What Is Restaking?
Restaking is the process of taking already-staked tokens (like ETH on Ethereum) and using them to secure additional protocols or services. Instead of your staked assets sitting idle, they can be rehypothecated to provide economic security to multiple networks simultaneously.
EigenLayer: The Pioneer
EigenLayer is a protocol built on Ethereum that introduces restaking. It allows ETH stakers to opt into validating new modules called Actively Validated Services (AVSs). By restaking, you earn additional rewards while contributing to the security of these services. EigenLayer’s smart contracts manage the slashing conditions, ensuring that misbehavior is penalized across all protocols.
How Restaking Works
- Stake ETH on Ethereum (via Lido, Rocket Pool, or directly).
- Deposit staked ETH into EigenLayer’s restaking contracts.
- Choose AVSs to validate (e.g., data availability layers, bridges, or oracles).
- Earn rewards from both Ethereum staking and AVS fees.
Beyond EigenLayer
Other projects like Renzo, Kelp DAO, and Puffer Finance are building liquid restaking tokens (LRTs) that simplify the process. These tokens represent your restaked position and can be used in DeFi, further increasing capital efficiency.
Pro Tips
- Understand slashing risks: Restaking amplifies risk. If an AVS you validate misbehaves, your entire restaked balance can be slashed.
- Diversify AVSs: Don’t put all your restaked ETH into one service. Spread across multiple AVSs to mitigate risk.
- Use liquid restaking tokens: LRTs like ezETH or rsETH allow you to stay liquid while earning restaking rewards.
- Monitor gas costs: Restaking involves multiple transactions. Use low-fee periods to minimize costs.
FAQ Section
What is the difference between staking and restaking?
Staking locks tokens to secure a single blockchain (e.g., Ethereum). Restaking takes those already-staked tokens and uses them to secure additional protocols, earning extra rewards.
Is restaking safe?
Restaking introduces additional slashing risks. If the AVS you validate is compromised or behaves maliciously, you can lose a portion of your staked assets. Always research AVSs before committing.
Can I restake any token?
Currently, restaking is primarily available for ETH and liquid staking derivatives (stETH, rETH). Some protocols are expanding to other assets like LSTs on other chains.
What are liquid restaking tokens (LRTs)?
LRTs are tokens that represent your restaked position. They can be traded, used as collateral, or deployed in DeFi while still earning restaking rewards. Examples include ezETH (Renzo) and rsETH (Kelp DAO).
How do I start restaking?
You can start by staking ETH on Ethereum, then depositing your staked ETH into EigenLayer’s app. Alternatively, use a liquid restaking protocol like Renzo or Kelp DAO for a simpler experience.
Conclusion
Restaking is reshaping crypto security by making capital work harder. EigenLayer has opened the door to a new paradigm where staked assets can secure multiple networks, driving efficiency and innovation. As the ecosystem matures, expect more AVSs, better risk management tools, and deeper integration with DeFi. For more details on this, check out our guide on Animoca Brands Chairman Declares Metaverse Over, Predicts 100 Billion AI Agents. You might also be interested in reading about Vitalik Buterin Reveals 90% Net Worth in ETH During Foundation Restructuring.
Bitcoin Layer 2s: Stacks, Lightning, and Runes Guide – Scaling Bitcoin for the Future
Bitcoin, the world’s first cryptocurrency, has long faced scalability challenges. Enter Bitcoin Layer 2 solutions—protocols built on top of Bitcoin to enhance transaction speed, reduce costs, and unlock new functionalities. This guide explores three key Layer 2 innovations: Stacks, Lightning Network, and Runes. Whether you’re a developer, investor, or enthusiast, understanding these technologies is crucial for navigating the next phase of Bitcoin’s evolution.
Key Concepts
1. Lightning Network
The Lightning Network is a second-layer protocol that enables instant, low-cost Bitcoin transactions by creating off-chain payment channels. Users can transact without recording every transaction on the main blockchain, settling only the final balance. This makes microtransactions and everyday payments feasible, positioning Bitcoin as a viable medium of exchange.
2. Stacks (STX)
Stacks is a Bitcoin Layer 2 that brings smart contracts and decentralized applications (dApps) to Bitcoin. It uses a unique consensus mechanism called Proof of Transfer (PoX), where miners transfer Bitcoin to secure the network. Stacks enables DeFi, NFTs, and other programmable applications while inheriting Bitcoin’s security. Its native token, STX, is used for gas fees and governance.
3. Runes
Runes is a newer protocol that allows for the creation of fungible tokens directly on Bitcoin, similar to ERC-20 tokens on Ethereum. Built on the Bitcoin blockchain, Runes leverages the security of Bitcoin while enabling token issuance, trading, and DeFi use cases. It’s designed to be efficient and user-friendly, potentially revolutionizing how assets are created and exchanged on Bitcoin.
Pro Tips
- Start Small with Lightning: Use wallets like Phoenix or Breez to experiment with Lightning payments. Start with small amounts to understand channel management and routing fees.
- Explore Stacks dApps: Try platforms like Alex or StackingDAO to earn yields through Bitcoin-based DeFi. Always audit smart contracts before depositing funds.
- Runes for Token Issuance: If you’re a developer, test Runes on Bitcoin testnet first. Use tools like Ordinals to understand how inscriptions and token standards work.
- Security First: Never share your private keys. Use hardware wallets (e.g., Ledger, Trezor) to store Layer 2 assets securely.
For more details on this, check out our guide on Bitcoin in Danger of Dropping to $60,000, Analysis Shows.
FAQ Section
Q: Are Bitcoin Layer 2s secure?
Yes, they inherit Bitcoin’s security to varying degrees. Lightning uses cryptographic channels, Stacks uses PoX with Bitcoin finality, and Runes runs directly on Bitcoin. However, smart contract bugs or user errors can still pose risks.
Q: Can I use Layer 2s with my existing Bitcoin wallet?
Not always. Lightning requires a compatible wallet (e.g., Phoenix, Muun). Stacks has its own wallet (e.g., Hiro Wallet). Runes can be managed with Ordinals-compatible wallets like Xverse.
Q: What are the fees for using these Layer 2s?
Lightning fees are negligible (often less than a cent). Stacks fees are paid in STX and vary by network congestion. Runes transaction fees depend on Bitcoin network activity.
Q: Which Layer 2 is best for DeFi?
Stacks currently leads in Bitcoin DeFi with lending, DEXs, and yield farming. Runes is emerging for tokenized assets, while Lightning focuses on payments.
You might also be interested in reading about DePIN Explained: Earning Passive Income with Infrastructure.
Conclusion
Bitcoin Layer 2s are unlocking new possibilities for the world’s most secure blockchain. Lightning Network makes Bitcoin spendable, Stacks brings programmability, and Runes enables tokenization. As these technologies mature, they could drive mass adoption and redefine Bitcoin’s role in the global economy. Stay informed, experiment safely, and consider diversifying your crypto exposure across these innovative layers.
US Treasury Bills on Blockchain: The Risk-Free Rate On-Chain
US Treasury Bills (T-Bills) are short-term debt obligations issued by the U.S. government, traditionally considered the closest proxy to a risk-free rate in global finance. Now, through tokenization, these instruments are being brought on-chain, allowing investors to access the yield of T-Bills with the efficiency and transparency of blockchain technology. This guide explores how the risk-free rate is being reimagined in the decentralized finance (DeFi) ecosystem.
What Are Tokenized US Treasury Bills?
Tokenized T-Bills represent fractional ownership in a pool of actual U.S. Treasury securities. Unlike holding T-Bills directly through a brokerage, tokenized versions offer 24/7 liquidity, lower minimum investments, and seamless integration with DeFi protocols. The key difference is off-chain vs on-chain: off-chain T-Bills settle in traditional markets with T+1 or T+2 settlement, while on-chain tokens can be transferred and traded instantly on a blockchain.
How Tokenized T-Bills Work
The process involves several layers to bridge traditional finance and blockchain:
- Tokenization: A Special Purpose Vehicle (SPV) or fund holds the actual T-Bills in a custodian account (e.g., with a regulated bank or broker-dealer).
- Issuance: The SPV issues digital tokens (e.g., on Ethereum or Solana) that represent a claim on the underlying T-Bills. Each token is typically pegged to $1 or a stable value.
- Oracles: Price oracles (like Chainlink) feed the net asset value (NAV) of the T-Bill pool onto the blockchain, ensuring the token price reflects the underlying yield.
- Redemption: Investors can redeem tokens for fiat or stablecoins through the issuer, often with a 1-2 day settlement window.
Investment Analysis: Pros, Cons, and Risks
Pros
- Yield: Earn a yield close to the current U.S. Treasury rate (e.g., 4-5% APY) without needing a traditional brokerage account.
- Liquidity: Trade tokens 24/7 on decentralized exchanges or secondary markets.
- Fractional Ownership: Minimum investments can be as low as $1, democratizing access to T-Bills.
- Transparency: On-chain proof of reserves and regular audits provide visibility into the underlying assets.
Cons and Risks
- Regulatory Uncertainty: Tokenized securities may face evolving SEC or FINRA rules. KYC/AML requirements can limit accessibility.
- Smart Contract Risk: Bugs or exploits in the token contract or DeFi protocols could lead to loss of funds.
- Custodial Risk: The SPV or custodian holding the T-Bills introduces counterparty risk. If the custodian fails, token holders may not recover full value.
- Oracle Risk: If the price oracle fails or is manipulated, the token price may deviate from NAV.
For a broader market view, check out our analysis on What Hyperliquid’s USDH to USDC Switch Means for DeFi: A Beginner’s Guide. Investors often compare this to Mastering the MACD Histogram: A Simple Yet Powerful Strategy.
Tool Recommendation
To track tokenized T-Bill yields and analyze market trends, you need reliable charting tools. For the best charting tools to spot this pattern, try Bitget. Their platform offers real-time data on RWA tokens and DeFi yields, helping you make informed decisions.
FAQ Section
What is the yield on tokenized US Treasury Bills?
The yield closely tracks the current U.S. Treasury rate for short-term bills, typically between 4% and 5% APY as of 2025. However, it may be slightly lower due to management fees and operational costs.
Are tokenized T-Bills safe?
They carry the credit risk of the U.S. government (very low), but introduce additional risks like smart contract bugs, custodian failure, and regulatory changes. Always audit the issuer and the smart contract before investing.
How do I buy tokenized T-Bills?
You can buy them on platforms like Ondo Finance, Matrixport, or through DeFi protocols that offer RWA pools. Most require completing KYC and holding a supported stablecoin or cryptocurrency.
Conclusion
Tokenized US Treasury Bills represent a significant step in bridging TradFi and DeFi, offering a regulated, yield-bearing asset with on-chain efficiency. While risks remain—especially around custody and regulation—the asset class is gaining traction from major institutions like BlackRock and Franklin Templeton. For investors seeking a stable yield in a volatile crypto market, tokenized T-Bills provide a compelling option. As the ecosystem matures, expect broader adoption and deeper liquidity.
DePIN Explained: Earning Passive Income with Infrastructure
Introduction
Decentralized Physical Infrastructure Networks (DePIN) represent a paradigm shift in how we build, maintain, and monetize real-world infrastructure. By leveraging blockchain tokens and smart contracts, DePIN projects incentivize individuals to contribute physical resources—such as wireless hotspots, storage drives, computing power, or sensors—in exchange for passive income. This guide will walk you through the key concepts, pro tips, and tools to start earning with DePIN.
Key Concepts
- What is DePIN? DePIN stands for Decentralized Physical Infrastructure Networks. It uses blockchain to coordinate and reward participants for providing physical infrastructure services, such as internet connectivity (e.g., Helium), decentralized storage (e.g., Filecoin), or computing power (e.g., Render Network).
- Passive Income Model: Contributors earn tokens by running hardware or leasing resources. Rewards are typically distributed based on proof of contribution, uptime, or usage.
- Token Incentives: Native tokens are used to reward providers and can be traded on exchanges. The value of these tokens often correlates with network demand and utility.
- Real-World Utility: Unlike purely speculative crypto projects, DePIN networks solve real problems—lowering costs, increasing resilience, and democratizing access to infrastructure.
Pro Tips
- Start with Low-Cost Hardware: Many DePIN projects allow you to start with affordable devices (e.g., a Helium hotspot for ~$300). Research upfront costs vs. expected returns.
- Diversify Across Networks: Don’t put all your capital into one project. Spread investments across storage, compute, and connectivity DePINs to reduce risk.
- Monitor Tokenomics: Understand inflation rates, token supply, and reward halving schedules. Some projects become less profitable over time.
- Optimize Location: For wireless DePINs (e.g., Helium, Pollen Mobile), location is critical. Use coverage maps to find underserved areas with high earning potential.
- Use Low-Fee Exchanges: When converting your earned tokens to stablecoins or fiat, choose platforms with minimal fees to maximize net income.
FAQ Section
What is the minimum investment to start with DePIN?
It varies. Some projects require purchasing hardware (e.g., $200–$500 for a hotspot), while others let you lease existing resources (e.g., unused hard drive space) for free. Always check official documentation.
Are DePIN earnings taxable?
Yes, in most jurisdictions, crypto rewards are considered income. Consult a tax professional to understand your local reporting requirements.
How do I choose the right DePIN project?
Evaluate the team, tokenomics, community size, and real-world adoption. Look for projects with active development and partnerships. For more details on this, check out our guide on Bitcoin Layer 2s: Stacks, Lightning, and Runes Guide.
Can I lose money with DePIN?
Yes. Hardware costs, token price volatility, and network competition can lead to losses. Start small and reinvest profits.
Conclusion
DePIN is reshaping the infrastructure landscape by turning everyday contributors into passive income earners. Whether you’re running a hotspot, providing storage, or leasing compute power, the key is to research thoroughly, optimize your setup, and manage costs. As the sector matures, opportunities will expand—but so will competition. Start today, stay informed, and leverage low-fee platforms to keep your earnings high. You might also be interested in reading about Hyperliquid Perpetual Markets Explained: What the OpenAI & Anthropic Shutdown Means for Traders.

The Hidden Engine of Bitcoin: How Layer-2 Ecosystems Are Reshaping Trading
If you’ve been trading Bitcoin for a while, you’ve probably heard the term “Layer 2” thrown around—but what does it actually mean for your trading decisions? Think of Bitcoin’s main chain as the secure, heavy-duty foundation, like a bank vault. Layer-2 solutions are like express lanes built on top of that vault, allowing transactions to happen faster, cheaper, and with more flexibility. For traders, this opens up a whole new playground of opportunities, from yield farming on Bitcoin to arbitrage across scaling networks. In this post, we’ll break down the Bitcoin Layer-2 ecosystem, show you how to spot trading setups, and keep your risk in check.
How It Works
Bitcoin Layer-2 ecosystems are networks built on top of the Bitcoin blockchain to handle transactions off the main chain while still benefiting from its security. The most famous example is the Lightning Network, which enables instant, low-cost payments. But newer players like Stacks, RSK, and Liquid are adding smart contract functionality, allowing decentralized finance (DeFi) on Bitcoin. For traders, this means you can now move BTC into these Layer-2 networks to trade tokens, provide liquidity, or even stake—all while keeping your core Bitcoin holdings safe on Layer 1.
The key is understanding that each Layer-2 has its own token (like STX for Stacks) and its own market dynamics. When activity on a Layer-2 spikes—say, due to a new DeFi app or a network upgrade—the token price often moves in tandem with increased usage. This creates a correlation play: if Bitcoin is trending up, Layer-2 tokens might amplify those gains, but they can also drop faster during corrections.
The Setup
Here’s a straightforward trading idea for beginners: the “Layer-2 Momentum Play.”

1. Identify the Leader: Track the top Bitcoin Layer-2 tokens by market cap (e.g., STX, RIF for RSK, or L-BTC on Liquid). Use a screener like CoinGecko or TradingView to see which one has the highest 24-hour volume increase.
2. Check Bitcoin’s Trend: Look at Bitcoin’s daily chart. If BTC is above its 50-day moving average and showing bullish momentum (higher highs, higher lows), it’s a green light for Layer-2 plays.
3. Enter on Breakout: Wait for the selected Layer-2 token to break above its 20-day simple moving average (SMA) with above-average volume. This signals that capital is flowing into that ecosystem.
4. Set a Target: Aim for a 10-15% gain over 3-7 days, as these tokens are more volatile than Bitcoin itself. Use a trailing stop-loss at 5% below the entry price to lock in profits as the trade moves.
For example, if Stacks (STX) breaks out while Bitcoin is strong, you might buy at $1.50, target $1.72, and set a stop at $1.42.
Risk Management
Layer-2 tokens are exciting, but they carry extra risks. Because they’re built on Bitcoin, they inherit some of its stability, but they’re also subject to network-specific issues like hacks, low liquidity, or regulatory scrutiny. Here’s how to stay safe:
- Position Sizing: Never allocate more than 5% of your portfolio to any single Layer-2 token. These are speculative plays, not core holdings.
- Use Stop-Losses: Always set a hard stop-loss at 8-10% below entry. Layer-2 tokens can gap down if the underlying network has a technical glitch.
- Watch Bitcoin First: If Bitcoin drops 5% in a day, Layer-2 tokens often fall 10-15%. Consider closing all Layer-2 positions if Bitcoin breaks below a key support level, like its 200-day moving average.
- Stay Updated: Follow the official channels of the Layer-2 project you’re trading. A delayed upgrade or a security audit can cause sudden price swings.
Conclusion
Bitcoin Layer-2 ecosystems are no longer just a technical curiosity—they’re a real trading frontier. By understanding how these networks work and using simple momentum setups, you can tap into moves that often outpace Bitcoin itself. Remember, the key is to treat them as tactical trades, not long-term holds, and always manage your risk with tight stops and small positions. Start by watching one Layer-2 token this week, and see how it behaves relative to Bitcoin. You might just discover a new edge in your trading toolkit.
How to Secure Your Crypto Wallet: A Step-by-Step Guide
Introduction
Cryptocurrency wallets are the gateways to your digital assets, but they are also prime targets for hackers. With billions of dollars lost to scams, phishing attacks, and poor security practices each year, securing your wallet is not optional—it’s essential. This comprehensive guide walks you through the exact steps to protect your crypto wallet, from choosing the right wallet type to implementing advanced security measures. Whether you’re a beginner or an experienced trader, these strategies will help you sleep better at night knowing your funds are safe.
Key Concepts
- Hot Wallet vs. Cold Wallet: Hot wallets (e.g., MetaMask, Trust Wallet) are connected to the internet and convenient for daily use, but they are more vulnerable. Cold wallets (e.g., Ledger, Trezor) store your private keys offline, offering maximum security for long-term holdings.
- Private Keys & Seed Phrases: Your private key is the master key to your wallet. A seed phrase (usually 12 or 24 words) can restore your wallet. Never share these with anyone, and never store them digitally.
- Two-Factor Authentication (2FA): Adds an extra layer of security by requiring a second verification step, such as a code from an authenticator app (e.g., Google Authenticator) or a hardware key (e.g., YubiKey).
- Phishing & Scams: Fake websites, emails, or DMs that trick you into revealing your private keys or seed phrase. Always double-check URLs and never click on suspicious links.
- Smart Contract Risks: When using DeFi or dApps, malicious smart contracts can drain your wallet. Only interact with audited and reputable protocols.
Pro Tips
- Use a Hardware Wallet for Large Amounts: If you hold more than you can afford to lose, invest in a hardware wallet like Ledger or Trezor. Keep it in a safe place.
- Enable 2FA Everywhere: Use an authenticator app (not SMS) for exchanges and wallet apps. SMS-based 2FA can be hijacked via SIM swapping.
- Create a Separate Wallet for DeFi: Use a dedicated hot wallet with limited funds for interacting with dApps and DeFi protocols. Keep your main savings in a cold wallet.
- Regularly Update Software: Keep your wallet app, browser extensions, and device firmware up to date to patch known vulnerabilities.
- Backup Your Seed Phrase Offline: Write it down on paper and store it in a fireproof safe. Consider a metal backup (e.g., Cryptosteel) for disaster protection.
- Beware of Clipboard Hijackers: Malware can replace your copied wallet address with an attacker’s address. Always verify the address before sending.
FAQ Section
Q: What is the safest type of crypto wallet?
A: Hardware wallets (cold wallets) are the safest because they store your private keys offline. Popular options include Ledger Nano X and Trezor Model T.
Q: Can I recover my wallet if I lose my phone?
A: Yes, if you have your seed phrase. Simply download the same wallet app on a new device and use the seed phrase to restore access. Never store your seed phrase on your phone or in the cloud.
Q: Is it safe to keep crypto on an exchange?
A: It’s not recommended for long-term storage. Exchanges are prime targets for hackers (e.g., Mt. Gox, FTX). Only keep what you need for trading, and move the rest to a private wallet.
Q: What should I do if I think my wallet is compromised?
A: Immediately transfer your funds to a new wallet with a new seed phrase. Revoke any token approvals using tools like Revoke.cash. Change passwords and enable 2FA on all related accounts.
Q: How often should I update my wallet software?
A: As soon as updates are available. Enable automatic updates if possible. Delaying updates leaves you vulnerable to known exploits.
Conclusion
Securing your crypto wallet is a continuous process, not a one-time setup. By following the steps in this guide—choosing the right wallet, protecting your private keys, enabling 2FA, and staying vigilant against scams—you can dramatically reduce your risk of losing funds. Remember: in crypto, you are your own bank. Take ownership of your security.
For more details on this, check out our guide on The Bollinger Band Squeeze: How to Catch Explosive Breakouts Before They Happen.
You might also be interested in reading about Tax Loss Harvesting in Crypto: A Complete Guide for Traders (2024).
Master the RSI Divergence Strategy: Spot Trend Reversals Early
Have you ever watched a coin pump hard, only to crash moments after you bought in? Or seen a token dip, sell in panic, and then watch it rocket 50% higher? That’s the market playing tricks on your emotions. But there is a powerful, time-tested tool that can help you see these reversals before they happen: RSI Divergence.
In this guide, we’ll break down what RSI divergence is, how to spot it on your charts, and—most importantly—how to trade it without getting wrecked.
How It Works
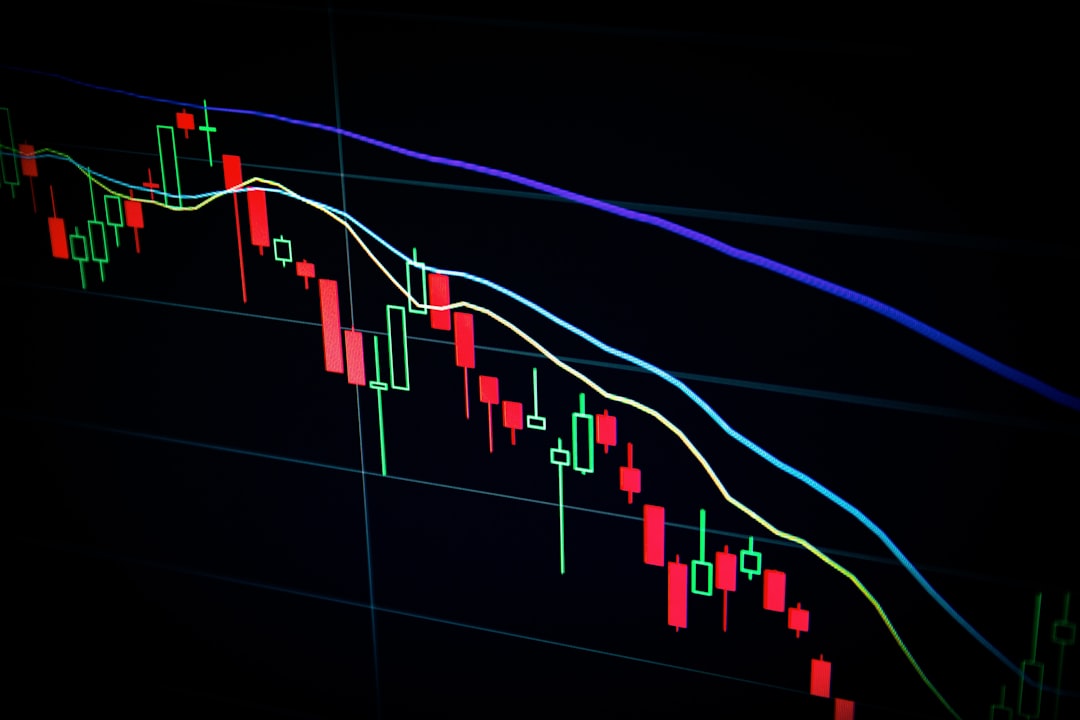
The Relative Strength Index (RSI) is an oscillator that measures the speed and change of price movements. Normally, when price goes up, RSI goes up. When price goes down, RSI goes down. But when they start to disagree, that’s divergence.
There are two types:
- Bullish Divergence: Price makes a lower low, but RSI makes a higher low. This suggests selling momentum is weakening, and a reversal to the upside is likely.
- Bearish Divergence: Price makes a higher high, but RSI makes a lower high. This suggests buying momentum is fading, and a reversal to the downside is coming.
Think of it like a car engine revving at redline—eventually, it has to slow down. Divergence is your warning light.
The Setup
To trade this effectively, follow a clear checklist:
1. Identify the trend. Divergence works best in a clear trend (uptrend for bearish divergence, downtrend for bullish divergence).
2. Mark the swing points. Draw lines connecting recent highs (for bearish) or lows (for bullish) on both price and RSI.
3. Confirm the divergence. Make sure price and RSI are moving in opposite directions. A subtle difference is fine—you don’t need a massive gap.
4. Wait for confirmation. Don’t jump in the moment you see divergence. Wait for a break of a key level (like a trendline or a recent high/low) or a candlestick pattern (like a pin bar or engulfing candle).
5. Enter the trade. For bullish divergence, buy on the confirmation candle. For bearish divergence, sell or short on the confirmation.
Risk Management
No strategy is perfect. Divergence can sometimes “fail” and the trend continues. That’s why risk management is your safety net.
- Stop Loss: Place your stop just beyond the recent swing point. For a bullish trade, put it below the last low. For a bearish trade, above the last high.
- Position Size: Never risk more than 1-2% of your account on a single trade. Divergence is a signal, not a guarantee.
- Take Profit: Use a risk-reward ratio of at least 1:2. For example, if your stop is 5% away, aim for a 10% gain. You can also take partial profits at key resistance or support levels.
- Timeframe Matters: Divergence on higher timeframes (1H, 4H, daily) is more reliable than on 1-minute or 5-minute charts. Stick to higher timeframes for better signal quality.
Conclusion
RSI divergence is like having a crystal ball—but one that only works if you know how to read it. It helps you catch trend reversals before the crowd, giving you an edge in a noisy market. Start by practicing on historical charts, then paper trade for a few weeks. When you’re consistent, go live with small size.
Remember: The market rewards patience and discipline. Divergence is your friend, but only if you respect the rules. Happy trading!
BlackRock BUIDL: Institutional Crypto Entry Guide
BlackRock’s BUIDL fund marks a watershed moment for Real World Assets (RWAs) in crypto. As the world’s largest asset manager with over $10 trillion in assets under management, BlackRock’s entry signals that institutional money is not just exploring tokenization—it is actively building the infrastructure for a new financial paradigm. This guide explains how BUIDL works, its investment implications, and what it means for the broader RWA ecosystem.
What Are Real World Assets (RWAs) and Why BUIDL Matters
Real World Assets are tangible or intangible assets—such as government bonds, real estate, commodities, or private credit—that are represented as digital tokens on a blockchain. The key distinction is off-chain vs on-chain: off-chain assets exist in traditional legal and custody frameworks, while on-chain tokens represent ownership or rights to those assets. BlackRock’s BUIDL (BlackRock USD Institutional Digital Liquidity Fund) tokenizes short-term U.S. Treasury bills, offering institutional investors a regulated, yield-bearing stablecoin alternative. This bridges TradFi and DeFi by providing 24/7 liquidity, fractional ownership, and transparent on-chain settlement.
How BUIDL Works: The Technical Process
The tokenization process follows a structured framework:
- Asset Selection: BlackRock selects high-quality, liquid assets—primarily U.S. Treasury bills and repurchase agreements.
- Special Purpose Vehicle (SPV): A legal SPV is created to hold the underlying assets, isolating them from BlackRock’s balance sheet.
- Tokenization: The SPV issues digital tokens (BUIDL) on the Ethereum blockchain, each representing a proportional claim on the fund’s net asset value.
- Oracle Integration: Price oracles (e.g., Chainlink) provide real-time, tamper-proof data on the fund’s value to smart contracts.
- On-Chain Distribution: Investors purchase BUIDL tokens directly via whitelisted wallets, earning daily yield distributed in USDC.
This process ensures that the off-chain assets remain legally compliant while the on-chain tokens enable instant transfers, 24/7 trading, and composability with DeFi protocols.
Investment Analysis: Pros, Cons, and Risks
Pros
- Institutional-Grade Yield: BUIDL targets a yield comparable to short-term Treasuries (currently ~5% APY), paid daily in USDC.
- Regulatory Compliance: The fund is registered under the Investment Company Act of 1940, offering investor protections.
- Liquidity: Unlike traditional bond funds, BUIDL tokens can be traded 24/7 on secondary markets.
- Transparency: On-chain proof of reserves via attestations from BlackRock’s custodian.
Cons
- Limited DeFi Composability: BUIDL is not yet widely integrated into DeFi lending or yield protocols.
- Whitelisting Requirements: Only accredited investors can participate, limiting retail access.
- Smart Contract Risk: The Ethereum blockchain and associated oracles introduce technical vulnerabilities.
Risks
- Regulatory Risk: Changing SEC or CFTC rules could impact tokenized funds.
- Counterparty Risk: Although BlackRock is a blue-chip manager, the SPV structure still relies on legal enforcement.
- Market Risk: Treasury yields can fluctuate, affecting returns.
For a broader market view, check out our analysis on The Rise of AI Agents in Crypto: A Complete Guide. Investors often compare this to Fake CMC Token Alert: What Beginners Need to Know About Brand Impersonation Scams.
Tool Recommendation: Getting Started Safely
If you want to explore tokenized RWAs or practice yield strategies, Binance offers a secure environment with access to RWA-related tokens and educational resources. You can practice this setup safely on Binance. Create an account here to begin.
Frequently Asked Questions
What is the minimum investment for BlackRock BUIDL?
The minimum investment is typically $100,000 for accredited investors, though secondary market purchases may have lower thresholds.
How does BUIDL differ from USDC or USDT?
BUIDL is a tokenized money market fund that earns yield, while USDC and USDT are stablecoins backed by cash and equivalents that do not pass yield to holders.
Is BUIDL available to retail investors?
Currently, BUIDL is limited to accredited investors under SEC regulations. However, secondary trading on platforms like Binance may offer indirect exposure.
Conclusion
BlackRock’s BUIDL fund is a landmark development that validates tokenization as a legitimate institutional asset class. It offers a regulated, yield-bearing on-chain product that bridges the gap between TradFi and DeFi. While risks remain—particularly around regulation and smart contract security—the entry of the world’s largest asset manager signals that RWAs are here to stay. For investors seeking exposure to this trend, starting with a trusted platform like Binance is a prudent first step.
What Is Impermanent Loss? Liquidity Providing Explained
Impermanent loss is one of the most misunderstood risks in decentralized finance (DeFi). If you’ve ever provided liquidity to an automated market maker (AMM) like Uniswap, PancakeSwap, or SushiSwap, you’ve likely encountered this phenomenon. In simple terms, impermanent loss occurs when the price of your deposited assets changes compared to when you deposited them. The more volatile the price movement, the greater the loss — and it becomes “permanent” only if you withdraw your liquidity at that unfavorable moment.
This guide breaks down everything you need to know about impermanent loss: how it works, why it happens, and how to minimize it. Whether you’re a beginner or an experienced liquidity provider, understanding this concept is essential for protecting your capital.
Key Concepts
1. What Is an Automated Market Maker (AMM)?
AMMs are decentralized exchanges that use liquidity pools instead of traditional order books. Liquidity providers deposit pairs of tokens (e.g., ETH/USDC) into these pools and earn trading fees in return. The price of each token is determined by a constant product formula: x * y = k, where x and y represent the reserves of each token in the pool.
2. How Does Impermanent Loss Occur?
Impermanent loss happens because the AMM algorithm automatically rebalances your deposited tokens to maintain the constant product. If one token’s price rises significantly relative to the other, the pool will sell some of the appreciating token and buy more of the depreciating token. When you withdraw, you end up with a different ratio than what you deposited — and potentially less value than if you had simply held the tokens outside the pool.
3. The Math Behind Impermanent Loss
Let’s say you deposit $1,000 worth of ETH and $1,000 worth of USDC into a 50/50 pool. If ETH’s price doubles, the AMM will rebalance so that you hold less ETH and more USDC. Your total value might be $1,800 in the pool, but if you had just held the original tokens, you would have $2,000. The $200 difference is the impermanent loss.
4. When Does It Become Permanent?
Impermanent loss is only “impermanent” if you wait for the token prices to return to their original ratio. If you withdraw while the price divergence exists, the loss becomes permanent. This is why timing and strategy matter.
Pro Tips
- Choose stable pairs: Pools with two stablecoins (e.g., USDC/USDT) have minimal impermanent loss because prices stay close to 1:1.
- Look for high trading fees: Pools with high volume generate enough fees to offset impermanent loss over time.
- Use concentrated liquidity: Protocols like Uniswap v3 allow you to provide liquidity within a specific price range, reducing exposure to large price swings.
- Monitor volatility: Avoid providing liquidity to highly volatile pairs unless you are compensated with very high fees or incentives.
- Consider yield farming: Some platforms offer extra token rewards that can make up for impermanent loss.
For more details on this, check out our guide on Mastering Order Blocks and Fair Value Gaps: The Smart Money’s Secret Playbook.
FAQ Section
Q: Can impermanent loss be avoided completely?
A: Not entirely, but you can minimize it by using stablecoin pairs, providing liquidity in low-volatility environments, or using protocols that offer impermanent loss protection (e.g., Bancor, Thorchain).
Q: Is impermanent loss the only risk of liquidity providing?
A: No. Other risks include smart contract bugs, hacks, and slippage. Always do your own research and start with small amounts.
Q: How do I calculate impermanent loss?
A: You can use online calculators like the one on DailyDeFi. Simply input the price change of one token relative to the other, and it will show the percentage loss.
Q: Does impermanent loss apply to all liquidity pools?
A: Yes, any AMM pool that uses a constant product formula is subject to impermanent loss. However, some newer models (e.g., Curve’s stable pools) are designed to minimize it.
Q: When should I withdraw my liquidity?
A: Ideally, withdraw when the token prices are close to the ratio you deposited, or when the fees earned outweigh the impermanent loss. Use analytics tools to track your pool’s performance.
You might also be interested in reading about Brazil’s Stablecoin 24-Hour Hold Explained: What It Means for Your Transfers.
Conclusion
Impermanent loss is a fundamental risk of liquidity providing in DeFi, but it doesn’t have to be a deal-breaker. By understanding how it works, choosing the right pairs, and using tools like impermanent loss calculators, you can make informed decisions and even profit from fees and incentives. Start small, monitor your positions, and never invest more than you can afford to lose. With the right strategy, liquidity providing can be a powerful way to earn passive income in the crypto ecosystem.